

Welcome! I am so excited to share this sew along with all of you! I really hope that you have as much fun with these little dresses as I have had.
This is the first sew along that I have hosted here at The Merry Church Mouse, so please feel free to comment as to what you like or dislike or what I can improve upon. Let me know if a step is unclear and I will do my best to help you understand it.
In reading my book on time management, I have come to realize that knowing how long a task will take helps you to know where to place it within your time frame. I will post a time frame for each week's activity so that you know generally how long to expect each step to take.
So without further ado... let's get started, shall we?
Step 1: Cutting (time required-about 1 hour)
At this point, your fabric should be pre-washed and ironed. Iron it just as if it came off the bolt, with the fold down the middle, lining up your selveges.
This dress is composed, primarily, of rectangular pieces of fabric. I generally use a rotary cutter to cut these pieces. If you are not familiar with using a rotary cutter, there is a great tutorial here.
The rectangles and sizes you will need are as follows:
Size 2-3
Bodice - 2 rectangles at 13x9 inches
Tier 1 - 2 rectangles at 20x8 inches
Tier 2 - 2 rectangles at 40x8 inches (increase to 8 1/2 inches if you will be turning under the edge for a hem instead of serging the edge)
Size 4-5
Bodice - 2 rectangles at 14x9 1/2 inches
Tier 1 - 2 rectangles at 20x8 1/2 inches
Tier 2 - 2 rectangles at 40x8 1/2 inches (increase to 9 inches if you will be turning under the edge for a hem instead of serging the edge)
Size 6-7
Bodice - 2 rectangles at 15x10 1/4 inches
Tier 1 - 2 rectangles at 30x9 1/4 inches
Tier 2 - 4 rectangles at 30x9 1/4 inches (increase to 9 3/4 inches if you will be turning under the edge for a hem instead of serging the edge)
Size 8-10
Bodice - 2 rectangles at 17x12 1/2 inches
Tier 1 - 2 rectangles at 34x11 1/2 inches
Tier 2 - 4 rectangles at 34x11 1/2 inches (increase to 12 inches if you will be turning under the edge for a hem instead of serging the edge)
For the bodice pieces, leaving the fabric folded and using the measurement for the short side of the rectangle, cut a strip of fabric.

With the fabric still folded, cut the selvages off square and then measure the length of the long side of the rectangle and cut that square as well. Leave these two pieces layered together just as you cut them. Set them aside for the moment.

For the tier pieces, do the same using the short side of the rectangle as the width of the strip. Then measure in from the fold half the length of the long side of the rectangle.

In the end you should wind up with 6 rectangles of fabric for sizes 2-3 and 4-5 and 8 rectangles for sizes 6-7 and 8-10.
Set aside the tier pieces for now, we will come back to them in a couple of weeks.
Download and print the armhole templates.
I had an acrylic template made to use because I use this armhole shape quite often. That is what I am using for the pictures, but the paper template will work exactly the same way.

Trace a line with your Mark-B-Gone pen or tailors chalk (or soap sliver).

Flip the template over and do the same thing along the other side mirror imaging the first marking.
Cut along the markings through both layers of fabric at once.
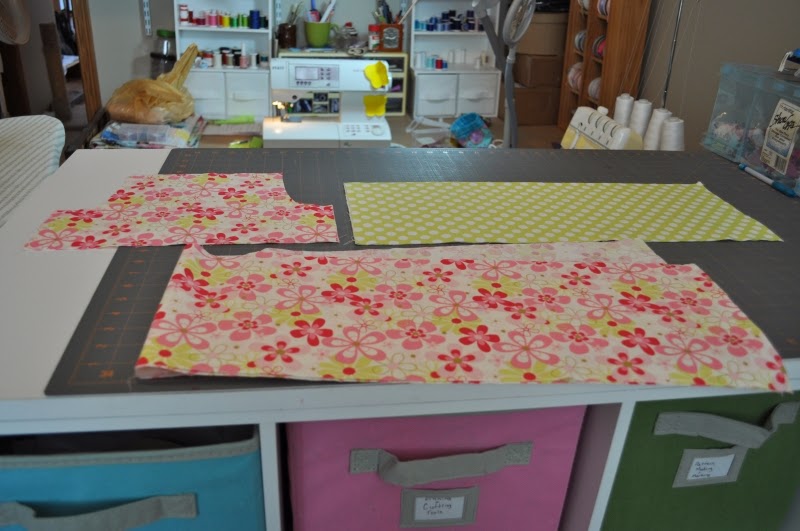
Your finished piece should look like this.
Your finished piece should look like this.

And here are the finished pieces all laid out. There are two of each of these. Mine are for a size 2-3
That's it for this week!
For next week's installment, we will assemble the bodice.
Happy cutting!

No comments:
Post a Comment